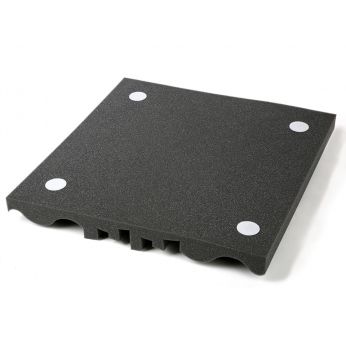


Fötter
Price
€28.00


Acoustic room kit for rooms < 6m2.
Includes: (8) acoustic panels + (4) basstraps.
Coverage: 4.32m2.
| Liten | Junior | Fläkt | Stor | Senior | Jätte |
|---|---|---|---|---|---|
< 6 m2 |
< 8 m2 |
< 10 m2 |
< 14 m2 |
< 17 m2 |
< 20 m2 |
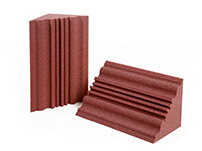
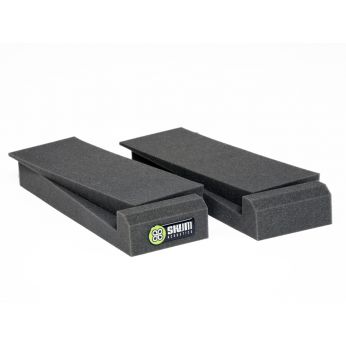
The Skum Acoustics room kits are combinations of our acoustic products (sound absorbers, bass traps...), specially selected to solve the major acoustic problems common to all rooms in one product, in an easy-to-use and affordable format.
The LITEN PACK room kit is the smallest of the family. It combines sound absorbers and bass traps in a balanced ratio designed for the acoustic treatment of smaller sized rooms of up to 6m2.
Features:
* Option: HAVSVÅG acoustic panels for only + € 5.95!
Normal packaging:
The following table shows a comparison of the estimated reverberation time at different frequency ranges (bass, mid and treble), before and after the installation of a Liten Pack in a demo room*.
| Reverberation T. (s) | T.low | T.mid | T.high |
|---|---|---|---|
| Without treat | 1.9 | 1.5 | 1.3 |
| + Liten Pack | 0.6 | 0.4 | 0.4 |
* Demo room: rectangular 6m2 room, walls and ceiling coated with a plaster finish, parquet floor, one window and a wooden door. Ceiling height: 2.5m.
The following chart will help you to choose the most appropriate acoustic treatment kit, depending on the size of your room and the kind of activity carried out.
Instructions:
| 0% - 10% | Insufficient / Low coverage | ||||||
| 10% - 20% | Partial / Spot treatment | ||||||
| 20% - 40% | Control Room (LEDE) | ||||||
| 40% - 60% | Recording Room | ||||||
| 60% - 80% | Voice / Vocal booth | ||||||
| Room size | Room kit model | ||||||
|---|---|---|---|---|---|---|---|
| W x L | m2 | LITEN | JUNIOR | FLÄKT | STOR | SENIOR | JÄTTE |
| 1,8 x 1,2 | 2,2 | 31% | 41% | 50% | 67% | 82% | - |
| 2,0 x 1,5 | 3,0 | 26% | 34% | 42% | 56% | 68% | 84% |
| 2,2 x 1,7 | 3,7 | 23% | 30% | 37% | 50% | 60% | 74% |
| 2,4 x 1,9 | 4,6 | 20% | 27% | 33% | 44% | 54% | 66% |
| 2,6 x 2,1 | 5,5 | 18% | 24% | 30% | 40% | 48% | 60% |
| 2,8 x 2,3 | 6,4 | 16% | 22% | 27% | 36% | 44% | 54% |
| 3,0 x 2,5 | 7,5 | 15% | 20% | 25% | 33% | 40% | 49% |
| 3,2 x 2,7 | 8,6 | 14% | 18% | 23% | 30% | 37% | 45% |
| 3,4 x 2,9 | 9,9 | 13% | 17% | 21% | 28% | 34% | 42% |
| 3,6 x 3,1 | 11,2 | 12% | 16% | 19% | 26% | 31% | 39% |
| 3,8 x 3,3 | 12,5 | 11% | 14% | 18% | 24% | 29% | 36% |
| 4,0 x 3,5 | 14,0 | 10% | 13% | 17% | 22% | 27% | 34% |
| 4,2 x 3,7 | 15,5 | 9% | 13% | 16% | 21% | 26% | 31% |
| 4,4 x 3,9 | 17,2 | 9% | 12% | 15% | 20% | 24% | 29% |
| 4,6 x 4,1 | 18,9 | 8% | 11% | 14% | 18% | 23% | 28% |
| 4,8 x 4,3 | 20,6 | 8% | 10% | 13% | 17% | 21% | 26% |
* The selection chart is based on a LEDE type room design, considering the surface treatment as the sum of the walls and ceiling.
* The results are obtained by estimation on a standard rectangular room with walls and ceiling coated with a plaster finish, a parquet floor, the presence of a window and a wooden door. Ceiling height: 2.5m.
If you are in doubt, please contact us! We will adapt to your needs and budget.
The fundamental objective of sound treatment in a room is to create a neutral audition area, so that decisions taken during the mixing / recording process are maintained in different playback environments (car, radio, mp3 player, Hi-Fi. equipment).
Unfortunately most residential and commercial rooms are rectangular with parallel walls. These characteristics enhance the appearance of some acoustic phenomena such as primary reflections; flutter echo, standing waves and resonances. Fortunately, since we are aware of the existence of these phenomena, we can anticipate them, predict the behaviour and develop specific solutions for each one.
This section details the major acoustic problems that appear in rooms, to allow us to understand their development and show how the Acoustic Kits help us to control their consequences, transforming a room with poor acoustics into a more controlled and highly functional acoustic environment in order to implement musical creativity with precision.
From the listener standpoint, the sound reception responds to the following pattern:
 |
|
In a room with a controlled environment, the decay sound curve shows clearly the direct sound, early reflections and the reverberant field.
There are three common phenomena that alter this behaviour:
| Reflections | Flutter echo | Resonant modes |
|---|---|---|
 |  |  |
| Primary reflections are high-intensity waves that bounce on the surfaces closest to the listening point (walls and ceiling). They reach the listener with a slight lag compared to the direct sound (due to the difference in the distance covered), causing cancellations in phase. This effect is known as 'Combfilter'. The strategic placement of sound absorbers reduces the intensity of these reflections, attenuating the 'Combfilter' effect, and instantly obtaining a more clearly defined listening space. This environment also reduces acoustic fatigue by decreasing the brain activity needed to discern what is real (direct sound) from the reflected sound, which is very much appreciated during long working days. |  |
 | This is a kind of echo that is extremely disturbing and easily perceptible; it, occurs when the sound wave rebounds between two reflective parallel surfaces. In reflective rooms (without absorption), the sound wave becomes trapped and bounces from one surface to another, losing very little intensity. This effect produces a metallic sound echo, which not only distorts the original sound listening but also makes it difficult to locate the sound source. Acoustic panels help us to solve this problem by reducing the intensity of sound wave in each bounce on the surface. The special design of our acoustic absorbers helps to improve the diffusion of reflected energy in each bound, at medium and high frequency, breaking up the sound wave into different reflections of a smaller intensity and sending it in different directions (diffusion effect). |
| When a sound wave bounces between two surfaces, interference occurs between the original wave and the back wave. The result of this interference is known as standing wave or resonant mode. This phenomenon is particularly problematic at low frequency, because its presence is more isolated and concentrated around the fundamental frequencies of the room. This fact abruptly disrupts the frequency response, in function of the listening position inside the room. With the installation of some bass traps in the corners of the room, it is possible to reduce the intensity of low-frequency energy, soften the resonant mode effects, and create a more neutral and accurate listening environment. |  |
Look at the particular pictures of each acoustic kit. They describe a standard installation into a demo room, which has the maximum dimensions that are recommended for each case. The demo mounting concepts can be adapted to the specific characteristics of your room.
The Skum Acoustics kits are configured to adopt an approximate installation of the Live-End Dead-End (LEDE) room design philosophy.
Due to its simplicity of concept and its versatility which allows it to be adapted to many different spaces, the LEDE philosophy has expanded over the last few decades to become the most popular and standard reference used in 'home studios' designs.
| The basic idea of the LEDE design is to create a neutral and balanced listening area (sweet spot), so that the productions can be reproduced correctly on audio devices outside the studio. The rear section (live-end) contains practically no acoustic absorption; it is more 'alive' in order to create the necessary space and naturalness in the environment. In this section, some design variants accept the installation of acoustic diffusers to break up the reflections and make the reverberant field more diffuse. |  |
There are a few very useful practical mounting tips to obtain maximum performance in installing the acoustic kit in your room; here we show you some essentials...
 |  |
This is a fundamental issue; the wrong choice will completely distort the result. When deciding on it, remember the following:
Stereo balance: look for symmetry in the listening position; place yourself at the midpoint between the two sidewalls of the room. The distance to the wall should be the same on the left channel and on the right channel otherwise there will be a lag between channels that distorts the stereo image.
Elude the centre of the room: it is a place where all resonant modes interact, the point with the most altered frequency response in the room. If possible, place the listening position near to the wall, to avoid the area of major conflict.
Reflections: this facilitates the placement of acoustic material. If possible, ensure there are no windows, viewing elements or doors on one side. Remember: symmetry is essential!
Natural diffusion: take advantage of atypical shapes in the room or the furniture to use them as natural diffusers. For instance, a bookcase that is lined with books.
The distance between both monitors and the listening point should draw an equilateral triangle (with all sides equal). You should focus the monitors at a point placed about 50cm behind the listening position.
This tip will improve the sound image.
Height of the panels: in general it is a good idea to place the centre of panels at the same height as those of the listener's ears. The ear of a sitting person are approx. at 1.2m from the ground; if they are standing (e.g. in a vocal booth), the height is usually around 1.6m - 1.7m.
Mirror technique: this is a technique that helps you easily find the primary reflection points. You only need a mirror and an assistant.
1. Stay at the listening point.
2. Your assistant should move the mirror along the reflective surface, at the height of your ears.
3. You will discover the optimal point where you should install the panels when you can see the monitors reflected in the mirrors.
Acoustic room kit for rooms < 6m2.
Includes: (8) acoustic panels + (4) basstraps.
Coverage: 4.32m2.